Re-Screening a Whole Pool Cage: What to Expect
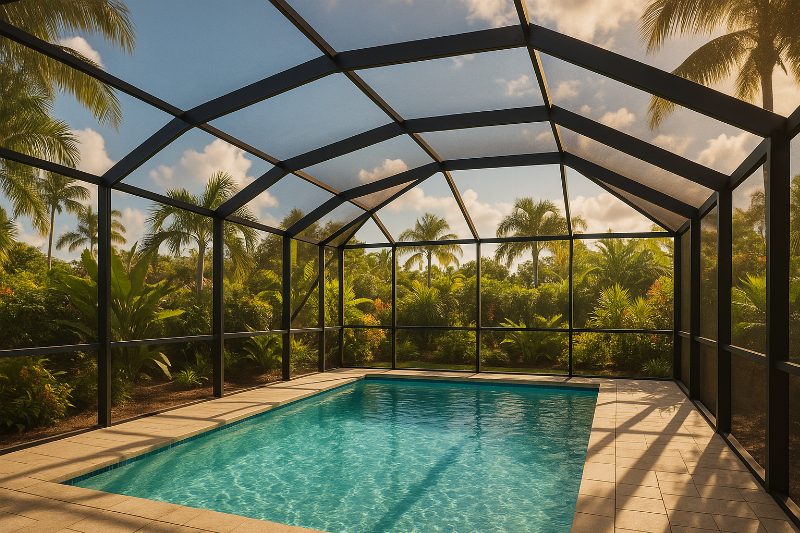
Full pool-cage re-screening is one of those projects that homeowners put off until they absolutely can't anymore - and then wonder why they waited so long once it's done.
If you've noticed the screen sagging in multiple bays, the mesh turning grey and brittle, or insects finding their way inside despite no obvious holes, you're probably past the point of patching individual panels. A whole-cage re-screen is likely the smarter move. This guide walks you through every stage of the process so you know what to expect, what decisions you'll need to make, and how to get the best result.
Why a Full Re-Screen Makes More Sense Than Patching
Patching is perfectly reasonable when you have one or two damaged panels on an otherwise sound cage. But screen mesh has a service life. Florida's UV exposure degrades the fibers from the inside out, long before the screen actually tears. If you're finding more than a handful of bad panels, or if large sections of mesh have become stiff and discolored, you're dealing with material that is nearing the end of its life across the entire structure.
Our post on why your screen looks grey and brittle: UV damage explained goes deep on this chemistry. The short version: once the coating breaks down, the weave loses its flexibility, and patched areas next to aged mesh will look mismatched and fail sooner than the new material anyway.
A full re-screen also gives you the chance to upgrade your mesh type, tighten up no-see-um protection, and have the spline inspected and replaced where needed. You end up with a uniform, clean appearance and a known starting point for the next maintenance cycle.
What Happens Before Work Begins: The Inspection
A proper re-screening job starts before a single panel comes down. A technician will walk the perimeter of your cage and assess:
- The frame condition. Bent or corroded aluminum sections need to be addressed before new screen goes in. Installing fresh mesh on a compromised frame shortens the life of the new material and can create tension problems.
- The spline channels. These are the grooves that hold the screen in place. If the channels are cracked, filled with debris, or too shallow from previous re-screens, the new spline won't seat properly.
- Corner and door hardware. Hinges, latches, and corner brackets take a beating. A re-screen is a natural opportunity to swap out hardware that's corroded or stiff.
- The roof screen panels. Overhead panels take more UV and physical stress than side panels. They often need a heavier mesh weight to hold up long-term.
Our detailed breakdown of the anatomy of a pool cage: frame, screen, spline, and hardware explains how each component interacts. Understanding that helps you have a more informed conversation with your technician during the inspection.
If you're located in Bradenton or Lakewood Ranch, salt-laden Gulf breezes can accelerate frame corrosion even on cages that are a few miles from the water, so the frame inspection matters more than many homeowners expect.
Choosing Your Screen Material
This is the decision most homeowners don't spend enough time on, and it has the biggest impact on long-term satisfaction.
Standard fiberglass mesh is the most common option. It's cost-effective, lets in good airflow, and works well for most residential cages. If your current screen is standard mesh and you've been happy with it, this is usually the right call again.
No-see-um screen has a tighter weave - typically 20x20 or finer - that blocks the tiny biting midges that plague waterfront areas. If you live on or near the water in places like Anna Maria Island, Siesta Key, or along the bay in Palmetto, the upgrade is almost always worth the modest additional cost. Our post on keeping no-see-ums out of your screened lanai for good covers the tradeoffs in airflow and light transmission, which are real but generally minor.
Super screen or solar screen options reduce glare and heat transfer into the lanai, which can make a meaningful difference if your pool area faces west and gets hammered by afternoon sun. Keep in mind that heavier mesh blocks more light and can change the feel of the space. Our comparison of Florida glass vs. privacy screen for your lanai touches on some of these same tradeoffs and is worth reading if you're weighing your options.
Pool-cage specific mesh weights also matter for overhead panels. Roof panels carry their own weight plus any debris that lands on them - leaves, small branches, the occasional bird. A heavier gauge holds up better in that position.
If you're unsure what your current mesh is, your technician can identify it during the inspection. Most homeowners don't know exactly what was installed by the previous owner, and that's completely normal.
The Re-Screening Process, Step by Step
Once the inspection is done and materials are ordered, here's how the actual work unfolds.
1. Removing the old screen and spline
Technicians work bay by bay, pulling the old spline out of the channel and rolling back the aged mesh. On a full cage this takes time - a large cage with overhead panels and multiple doors can have dozens of individual panels. The old material is rolled up and hauled away.
2. Cleaning the spline channels
This step is easy to skip and costly to skip. Debris, old spline fragments, and oxidation build up in the channels over the years. If the channel isn't clean, the new spline won't seat evenly, which leads to loose panels and premature failure. A good crew takes the time to clean each channel before moving on.
3. Cutting and rolling the new screen
Screen comes on large rolls. Each panel is cut to size, leaving a few inches of overlap on each side to allow for proper tensioning. Getting the tension right is a skill: too loose and the panel sags; too tight and it stresses the frame.
4. Installing the new spline
A rolling tool presses the spline into the channel on top of the screen, locking it in place. The technician works around the perimeter of each panel, adjusting tension as they go. For larger roof panels, two-person teams make this easier and produce a cleaner result.
5. Trimming the excess
Once the spline is set, the overhanging screen is trimmed flush with a utility knife. Done correctly, the edges are clean and the panel is taut without being drum-tight.
6. Doors and hardware
Screen doors are typically re-screened last. If hinges or latches are being replaced, this is when that work happens. Doors get extra attention because they take more physical stress than fixed panels.
7. Final walkthrough
A good crew walks the entire cage with you when the job is finished - checking tension, looking for any panels that don't look right, and making sure doors open and close smoothly. Don't skip this step. It's your opportunity to flag anything before the crew packs up.
How Long Does It Take?
For most residential cages in Bradenton, Sarasota, or Lakewood Ranch, a straightforward full re-screen takes one to two days. Larger cages, or cages that need significant frame repair or hardware replacement, can run longer. Weather matters too: crews can't safely work on overhead panels in high winds, and rain slows things down.
You don't need to be home for the entire job, but being available for the initial walkthrough and the final inspection is worthwhile.
Preparing Your Yard and Pool Area
A few things you can do before the crew arrives will make the job go smoother:
- Clear the pool deck of furniture, potted plants, and decorations. Technicians need to move freely around the perimeter.
- Let the crew know about any fragile items near the cage, including landscape lighting or irrigation heads close to the footers.
- Plan for some pool downtime. Depending on the cage layout and wind conditions, the pool may not be usable while overhead panels are being replaced. This is usually no more than a partial day.
- Secure pets. Power tools and open cage sections are not a good combination for curious dogs.
What About Insurance?
If a storm caused or accelerated the damage that led to this re-screen, it's worth checking whether your homeowner's policy covers any of the cost. Many Florida policies have specific provisions for screen enclosures, and the answer isn't always obvious from the policy summary. Our guide to filing a screen-damage insurance claim in Florida walks through how to document damage, what adjusters look for, and how to avoid common mistakes that result in denied claims. If a hurricane was involved, also read what to do after a hurricane damages your screen enclosure before you start any repairs.
What Does a Full Re-Screen Cost?
The honest answer is that price varies meaningfully based on cage size, mesh type, frame condition, and the number of panels involved. A modest lanai cage is a very different project from a large pool cage with multiple overhead panels and double doors.
Rather than guessing at a number that may not apply to your specific structure, the most useful thing we can do is assess your cage and give you an accurate quote. There are no surprises you'd rather avoid more than finding out mid-project that frame repairs add significant cost. The inspection conversation upfront is where that gets sorted out.
Why the Contractor You Choose Matters
Re-screening a whole cage is not a one-size-fits-all job. The mesh choices, the spline work, the frame assessment, the hardware - all of it depends on the specific structure and conditions. A crew that rushes the inspection, skips the channel cleaning, or installs the same mesh on every job regardless of the homeowner's situation will leave you with results that disappoint.
Our services are focused specifically on screen and pool-cage work throughout the Suncoast area. We're not a general contractor doing screen on the side. That focus means the technicians who show up know this work, understand local conditions, and stand behind what they do.
We serve homeowners across our full service area, from Parrish and Ellenton in the north down through Sarasota, Osprey, and Nokomis. If you're ready to talk about your cage, reach out and we'll set up an inspection. The whole conversation starts with a look at what you've actually got.
A full re-screen is one of the most satisfying home improvement investments a Florida homeowner can make. You go from a cage that lets bugs in, looks dingy, and nags at you every time you walk past, to one that looks sharp, functions the way it should, and gives you years of comfortable outdoor living. Getting there just requires knowing what the process looks like - and now you do.