What to Do After a Hurricane Damages Your Screen Enclosure
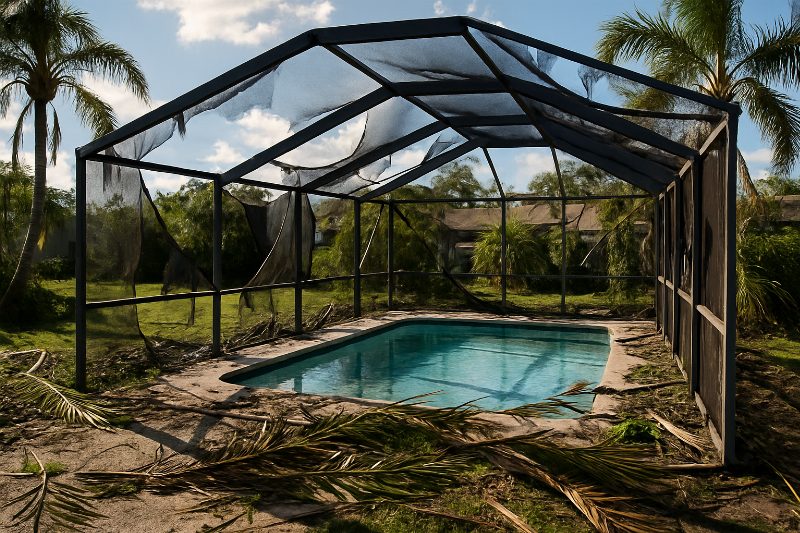
Hurricane season on Florida's Gulf Coast is not a matter of "if" but "when." If you live in Bradenton, Sarasota, Lakewood Ranch, or anywhere along the barrier islands, you already know that a single fast-moving storm can turn a pristine pool cage into a tangled mess of bent aluminum and shredded fiberglass screen overnight. The good news is that most storm-damaged enclosures are repairable, and acting in the right order saves you both money and stress.
This guide walks you through exactly what to do in the hours and days after a hurricane damages your screen enclosure, from your first walk around the yard to filing an insurance claim and scheduling professional repairs.
Step 1: Wait Until It Is Truly Safe to Go Outside
This sounds obvious, but it is worth saying plainly: do not walk outside to inspect damage while a storm is still moving through your area. Winds that have dropped to 30 or 40 mph can still send a loose screen panel sailing through the air. Wait for the official "all clear" from your county emergency management office before stepping outside.
Once the storm has passed, put on closed-toe shoes with good grip. Debris on wet concrete or pavers is a slip hazard. Wear gloves if you plan to handle any bent frame sections, because cut aluminum edges are sharp.
Step 2: Do a Full Visual Walk-Around Before You Touch Anything
Your first job is observation, not cleanup. Walk the entire perimeter of the enclosure and look at every surface methodically.
On the frame, watch for:
- Bent or buckled vertical uprights
- Horizontal beam sections that have shifted or separated at the joints
- Corner connectors that have cracked or pulled away from the slab
- Base rail fasteners that have lifted out of the concrete
On the screen panels, watch for:
- Full panel blowouts where the spline has pulled free
- Partial tears along the edges or at center seams
- Screen that looks intact but is bowed outward under residual tension
- Debris embedded in the mesh that is stressing the surrounding material
On the roof panels and ridge beam, watch for:
- Panels that have lifted or shifted
- Standing water pooling on horizontal screen sections (a sign the frame has sagged)
- Any debris, tree limbs, or exterior objects resting on top of the enclosure
Understanding how all of these components fit together helps you read the damage more accurately. If you want a quick refresher on what each part does, our post on the anatomy of a pool cage: frame, screen, spline, and hardware breaks it all down in plain language.
Step 3: Document Everything With Photos and Video
Before you remove a single piece of debris or touch a bent frame rail, grab your phone and document the scene thoroughly. Insurance adjusters need evidence of the original damage, not what things look like after you have started cleaning up.
Practical documentation tips:
- Shoot wide shots first so the adjuster can see the overall scale of the damage relative to the house.
- Then move in close for detail shots of each bent upright, torn panel, and pulled spline.
- Photograph the hardware connections at the slab, especially any anchor bolts that have pulled out.
- Record a slow video walk-around narrating what you see out loud. This creates a time-stamped record and is often more persuasive than still photos alone.
- Note the date and time in your camera metadata, or take a quick photo of a newspaper or your phone's lock screen showing the date at the start of the session.
If any neighbors' property (a tree limb, a fence panel) came over and contributed to the damage, photograph where that object came from before anyone moves it.
Our detailed guide on filing a screen-damage insurance claim in Florida covers exactly what adjusters look for and how to keep your claim from being delayed or underpaid. Read it before you call your insurance company.
Step 4: Make Safe, Temporary Repairs to Prevent Further Damage
Most homeowner policies require you to take "reasonable steps" to prevent additional damage after a covered loss. That means you can and should do some basic securing, but keep it minimal and document what you do.
Safe temporary measures:
- Remove large debris (branches, patio furniture) that is pressing against or resting on the frame, but only if you can do so without climbing on the enclosure structure.
- If a screen panel has blown completely out and is flapping, you can fold it and set it aside rather than let it catch more wind and stress the neighboring panels.
- If a frame section has partially detached and poses an immediate safety risk, use a few zip ties or utility cord to keep it from swinging, but do not try to straighten bent aluminum yourself. Aluminum that has been bent under load is stressed at the bend point and can crack unpredictably.
- Do not attempt to walk on a pool cage roof for any reason. Even an undamaged roof is not designed for foot traffic, and post-storm frames may have hidden structural weakness.
What to avoid:
- Do not use a power washer to "clean up" the enclosure. Water pressure can push debris deeper into joints and worsen any panel damage.
- Do not apply sealants or caulk over cracked connectors hoping to "glue" them. This can mask damage that an adjuster needs to see.
- Do not discard any bent or broken hardware. Your adjuster or contractor may need to inspect original parts.
Step 5: Call a Licensed Screen Enclosure Contractor for an Inspection
Once you have documented the damage, your next call should be to a licensed local contractor who specializes in screen enclosures and pool cages, not a general handyman. Here is why that distinction matters.
Storm damage to an enclosure often goes well beyond what is visible at first glance. A frame that looks only slightly bent at the top may have microfractures in the aluminum at the base plate. A screen panel that looks intact may have spline that is 80 percent pulled out and ready to blow in the next breeze. A qualified technician knows where to look and what to look for.
Our team serves homeowners across the entire region, including screen and pool-cage repair in Bradenton, Lakewood Ranch, Sarasota, Siesta Key, and Anna Maria Island. We understand the specific wind-load conditions and permit requirements in each municipality, which matters when repairs need to be inspected and signed off by a local building department.
You can see the full list of communities we serve on our service areas page and get a sense of the full range of repair work we do on our services page.
Step 6: Understand What Can Be Repaired vs. What Must Be Replaced
Not every storm-damaged enclosure needs to be torn down and rebuilt from scratch. Experienced contractors can often make targeted repairs that restore full structural integrity at a fraction of a full replacement cost. Here is a general breakdown of how decisions get made in the field.
Repairs are usually sufficient when:
- Individual screen panels are torn but the surrounding frame is straight and the spline channels are intact.
- One or two vertical uprights are bent but the base plates and corner connectors are solid.
- Hardware such as door hinges, latches, or screen door frames are damaged in isolation.
- The roof panels are displaced but the ridge beam and purlin connections are undamaged.
Replacement or major reconstruction is more likely when:
- The base rail has lifted from the slab in multiple locations, meaning the entire enclosure has shifted off its anchor points.
- Multiple uprights are bent beyond a point where they can be swapped individually without disrupting the whole frame.
- The enclosure is more than 15-20 years old and the aluminum is already corroded or fatigued, meaning new sections will not match and spot repairs will fail quickly.
- A tree or large object has fallen directly on the structure and caused cascading damage across multiple bays.
A good contractor will give you an honest assessment of both paths and let you make an informed decision. If you are weighing replacement options, our post comparing Florida glass vs. privacy screen for your lanai may help you think through whether this is a good moment to consider an upgrade.
Step 7: Coordinate Your Contractor and Your Insurance Adjuster
One of the most common mistakes homeowners make after a storm is letting their insurance adjuster inspect the property before a contractor has done so. Adjusters work quickly and may not have the specialized knowledge to identify every point of structural damage on a pool cage. If they write an estimate that misses items, it becomes much harder to add those items later.
The better approach is to have your contractor inspect first, prepare a written scope of work with itemized line items, and then share that document with your adjuster. This gives the adjuster a roadmap and reduces back-and-forth.
If your insurer disputes part of the repair scope or offers a settlement that seems too low, you have the right to request a re-inspection or hire a public adjuster to advocate for you. Our FAQ page has more information on how the claims process typically works and what your rights are as a policyholder in Florida.
Step 8: Plan the Repair Timeline Realistically
After a major storm, demand for screen enclosure contractors spikes across the entire region simultaneously. Bradenton, Palmetto, Parrish, Ellenton, Longboat Key, Nokomis, and Osprey all experience damage at the same time, which means every reputable contractor has a backlog.
Here is what realistic timing looks like in the aftermath of a significant storm:
- Initial inspection: Usually within a few days to a week, depending on contractor availability.
- Parts and materials: Aluminum extrusions and specialty screen material can take one to three weeks to arrive if local supply is depleted by high demand.
- Permit approval (if required): Structural repairs often require a permit, and municipal building departments may also be backlogged post-storm. Budget two to four weeks for permit approval in some jurisdictions.
- Actual repair work: Once materials are on hand and permits are approved, most single-enclosure repairs take one to three days of on-site work.
Being patient and not rushing to hire the first contractor who shows up at your door uninvited ("storm chasers") is important. Unlicensed contractors flood the market after major weather events and often do work that fails inspection or creates new problems.
Step 9: After the Repair, Think About Future Resilience
Once your enclosure is back in good shape, it is worth thinking about steps that improve its ability to survive the next storm.
- Check your screen mesh type. Standard 18x14 fiberglass screen catches more wind load than 20x20 "no-see-um" screen. If you are in an especially exposed location on Anna Maria Island or Siesta Key, discuss wind-resistant screen options with your contractor. Our post on keeping no-see-ums out of your screened lanai discusses mesh types and trade-offs in useful detail.
- Inspect the spline annually. Spline is the rubber cord that holds screen panels in their channels. UV exposure and heat cause it to harden and shrink over time, which means panels blow out more easily in high winds. Annual checks are cheap insurance.
- Look at the screen material itself. UV degradation makes fiberglass screen brittle and gray, reducing its ability to flex under wind load rather than tear. Our post on why your screen looks grey and brittle: UV damage explained goes into the science of this in detail.
- Confirm your base plates are secure. A contractor can check anchor bolt torque and condition during a routine maintenance visit. Corroded or loose anchor bolts are one of the most common reasons enclosures fail in storms.
You Do Not Have to Figure This Out Alone
Dealing with storm damage is stressful enough without trying to navigate the repair and insurance process by yourself. If your screen enclosure has been damaged and you are not sure where to start, reach out to our team and we will walk you through the inspection process, explain your options honestly, and help you coordinate with your insurer.
We have helped homeowners throughout Bradenton, Sarasota, Lakewood Ranch, Parrish, Palmetto, Ellenton, Anna Maria Island, Siesta Key, Longboat Key, Lido Key, Osprey, and Nokomis get their enclosures back in shape after some of the worst storms this coast has seen. We will do the same for you.